
DIY FRESH CHRISTMAS WREATH STEP BY STEP GUIDE
When a neighbor asked if all the ladies wanted to get together to make Christmas wreaths I was all in! I LOVE being crafty and creating my own goodies. I’ve made signs, wreaths, planters, you name it really. This was honestly one of my favorite ones yet and it was super simple!
What you’ll Need
Before you get started on creating your wreath you gotta get all your supplies first. Here is the list with links to access what I used!
Grapevine Wreath: I used a 14 in grapevine wreath that I got off of Amazon. Click here! I’m glad I ended up using the 14 in. I was nervous at first how small it was, but in the end it grew quite a lot.
Gardening Gloves: You’ll thank me later. You will want to use gloves. Pine needles are sharp little buggers and really can hurt your hands when you are stabbing them into a wreath. Click here for my fav.
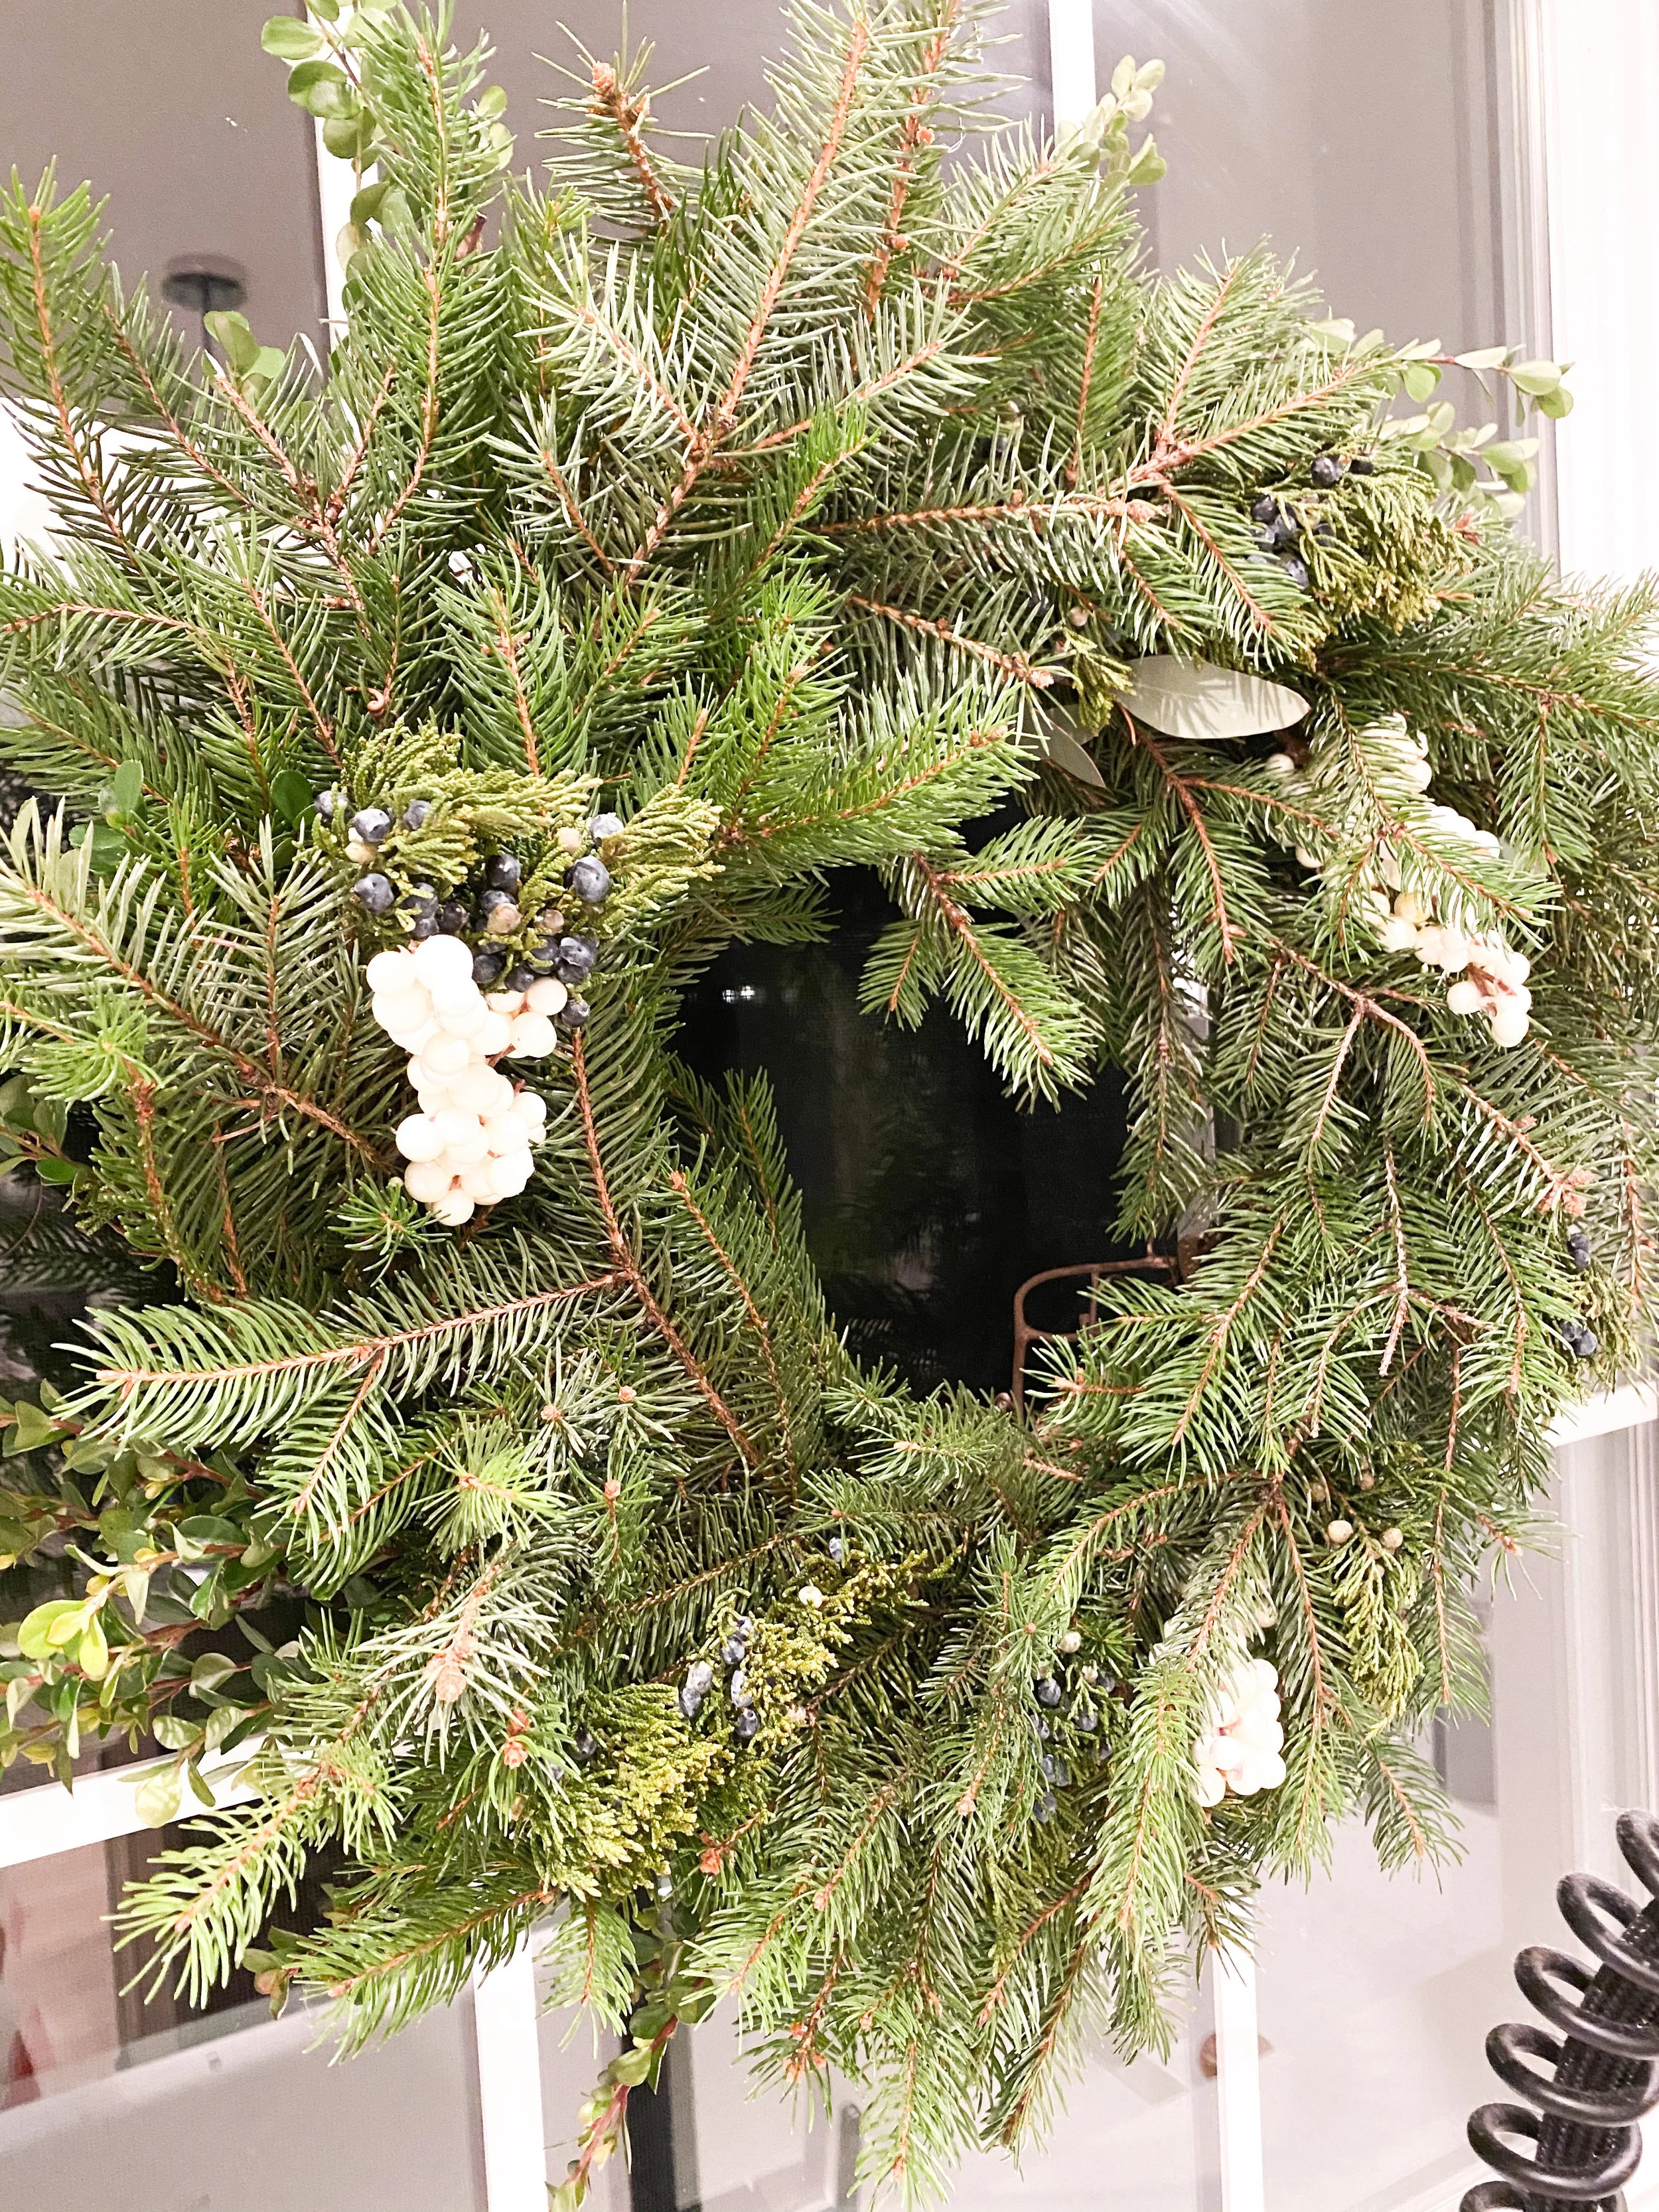
Greenery: We used A LOT of different types of greenery, but you really cannot go wrong with whatever you choose. We used a variety of pine, eucalyptus, pinecones, berries, holly berries, juniper etc. The more variety you have the better your wreath will turn out! You can get this stuff at a variety of gardening stores or even some grocery stories will carry it as well!
How to Create the perfect wreath

How to Make the Perfect Wreath
Here comes the tricky and fun part! Actually making the wreath. Once you have all your supplies you should be ready to go with creating the perfect wreath that inspires you! Here are my steps:
Pick a direction that you want your branches to go in. THIS IS SUPER IMPORTANT! If you want a “traditional” looking wreath you want all your branches going in the same direction.
Grab a couple pine branches that you like and put one in your starting point. Then put two more about 1/3 away from one another. This will give you a good idea of where to place your branches next. In order to put the branches into the grapevine, you will want to shove it in there to make sure it’s secure! At the end I’ll tell you a trick that helped me.
Start at one of the branches you placed in step #2 and then start to fill in with branches of your choice. I decided to use majority of pine. I filled in the wreath as I went.
Repeat step #3 to continue to fill in your wreath! It takes a long time to fill everything, I’m not gonna lie, I took out so many branches and replaced them to get the look I was going for! Don’t be afraid to rip pine branches apart to create the look you are hoping for.
Once your wreath is filled in with the majority of the greenery you want, the next step is to fill in with different varieties of greenery! (This is my favorite part!!). I decided to fill in with a variety of things including 2 different kinds of eucalyptus, juniper, and white berries. Some rules to follow with this: don’t over add. whatever you add, make sure it’s odd clusters (3’s or 5s). fill in the sides of your wreath.
And you’re DONE! Well, kind of. Once you are happy with all your add ins you should make sure it looks good upright. I needed to trim a couple pieces and move some spots because it wasn’t looking up to my standards (which are #obviously extremely high).
You’re DONE! Nope, just kidding. If any branches are weird and falling out even after moving them, reinforce them! It’s easy to use a small wire, zip ties, or twine.
YOU’RE DONE! Officially. I swear… Now you get to put that beauty up and enjoy for the season!


The photos show you the steps in order (minus step 8). Honestly such a perfect girls day with cocktails, food, and talk. Below you will find where I ended up putting my wreath and I’m OBSESSED. Check it out!


I’ve never put anything above our sink, but have been wanting to FOREVER. I figured this would look cute since it wasn’t huge and I’m literally #obsessed. I was able to hang it using a Command Strip so I didn’t have to ruin the wind or attempt to figure out how else to hang it! If you click here, those were the exact command hooks I used and it’s holding up really well!
Want to know the best part? At the end of the season you can take all the greenery out of the grapevine, save the grapevine wreath and reuse for other seasons or hang on to it for the next Holiday season!
Interested in a different style? Don’t worry… I made another one because #whynot? Comment below, which do you like better??

